Thursday, March 10, 2011

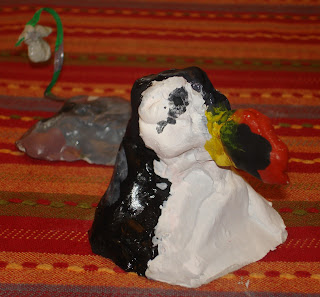
Animal sculptures out of clay


Clay is a fine-grained deposit found in soil.  Clay is easy to mold into different shapes when it is wet.  When it dries it hardens.  Clay can also be heated to very high temperatures (or fired) in a special oven called a kiln.

For our lesson, air-dry clay was used.  This dries and hardens well without the need for a kiln.

Once the clay had dried it can be painted and varnished for decoration and also to help preserve and protect it from damage.

Activity 1:

1. Sketch the basic shapes of the animal or object you wish to sculpt using an pencil on paper.  Draw very softly and lightly at first to find the right right shapes.  
  • Look for large and small shapes.  
  • Look at the shapes to see whether they are round or square, oblong or triangular, for example.
2. Sketch the animal or object from the side and again from the top, front and back to plan all sides of your sculpture.

Activity 2:

1. Mold the clay into the basic shapes of your animal or object.  Remember to look at the size of the shapes in comparison with the other shapes of the object.  For example, an elephant's torso would be large, fat and oblong in comparison to it's head, which would be smaller and rounder.
2. Join the basic shapes together using lots of water so that the shapes stick together well.
3. Use smaller bits of clay (and, again, lots of water) to push into cracks and parts of the sculpture that look as if they might break.
4. Concentrate now on the detail of the animal - the texture of skin or fur, the eyes and ears etc.

Activity 3:

1. Paint your sculpture when it is dry with acrylic paints.
2. Once the paint is dry, varnish the sculpture with a varnish appropriate for paint or ceramic work.
Oil Painting Lesson

 
Oil paint is made with pigments (or the thing that give the paint its color)  and a drying oil such as linseed oil.  Linseed oil comes from the flax plant and is also known as flax seed oil.

Oil paint can be applied to canvas (heavy cotton or linen fabric), wood or wood panels, masonite or hardboard, paper or card as well as many other surfaces.

The surface on which the paint is applied should be sized or sealed (especially for canvas surfaces) and primed so that the oil paint does not peel off when dry.  

Rabbit skin glue is a traditional size for an oil painting canvas surface.  It can be bought in powder form and then mixed with water and boiled to make a gelatinous glue which is then applied to the canvas.

Several coats of gesso (a paint primer) are then applied to the surface.


Oil paint can be applied in various ways.  A few examples are:
  • Impasto (thick, textured paint)
  • Glaze (a thin application of oil paint that has been mixed with linseed oil and turpentine, or other glazing mediums)
  • Scumble (paint applied using a dryish brush that is gently applied and picks up the surface texture of the canvas or board)

Activity 1:

1. Use the primary colors of red, yellow and blue to create other colors such as green, purple and orange by mixing the primary colors together.
2.  Try to create brown and black and other inventive colors by mixing the colors on your palette.

Activity 2:

1. Set up a still-life of objects with bright colors and place them on bright paper or fabric.
2. Paint a picture that focuses on just the colors.  Look carefully at the colors around the objects and paint them in.  See how colors appear brighter or duller when various colors are painted next to them (i.e orange next to green make each one look brighter).


Charcoal Drawing Lesson


Charcoal is made from wood that has been burnt, like charcoal you might use in a barbecue.
Artist’s charcoal can be just thin stick of burnt wood, or it can be charcoal that has been ground into a powder and has had a binder (a type of glue) added to it, and then it is molded into charcoal sticks.
 
Artist’s charcoal can be used in various ways:
  •   It can be used to draw with the narrow end
  •   It can be used on its side to make broad strokes
  •   It can be made into powder by crushing or rubbing hard on a piece of paper, and using    the powder to rub into the drawing

Activity 1

1.         Draw a jigsaw puzzle-like pattern on a piece of paper. 
2.         Try and make each section a different darkness or lightness to the sections that are next to it.
3.         Use the charcoal in many ways to fill in each section differently. 
4.         Try an use and invent as many different ways of using the charcoal as you can i.e dots, lines, rubbings, scribbles, using the charcoal with the tip or on its side etc.

Activity 2

1.         Set up an object that is white or light colored on a light colored table or piece of paper.
2.         Shine a light onto the object from one side, so that a clear shadow is seen from the other side.
3.         Look carefully at the light and shadow and try and copy as many different lightnesses and darks as you can.  There will be light areas in the shadows and darkish areas in the light – see if you can find these areas!